Initial Setup
Introduction
Setting up your main system requires only 3 parts (plus an ethernet cable) - all readily available from large online retailers like Amazon and eBay.
- Raspberry Pi 3B or later
- microSD Card (16 - 64 GB) and card reader
- Power Supply Adapter
- Ethernet Cable
- Optional Screw Terminals / Breakout board
- Optional Expansion Boards
- Optional 5V relay board
- Optional Structured Media Enclosure
- Optional UPS Battery Backup
- Optional Miscellaneous Electrical

Raspberry Pi
The Raspberry Pi is a series of small single-board computers developed in the United Kingdom by the Raspberry Pi Foundation in association with Broadcom (referred to as a "board" throughout this site). These boards are inexpensive and can be purchased from retailers such as Amazon or Best Buy.
The Voltsec system is supported on the following models of the Raspberry Pi:
- Raspberry Pi Model 5 (recommended)
- Raspberry Pi Model 4B
- Raspberry Pi Model 3B+
- Raspberry Pi Model 3B
The Raspberry Pi 5 can be purchased here from Amazon for around $60.00.

microSD Card
A microSD card (and card reader) is needed to install the Raspberry Pi operating system. We require the card to be at least 16GB and no more than 64GB. We recommend a SanDisk microSDHC UHS-1 Class 10 memory card available here from Amazon for approximately $6.00.
Power Supply Adapter
Your Raspberry Pi will not come with a power adapter needed to power your system unless it specifically says on the packaging one is included. The type of power adapter you need will depend on the model of Raspberry Pi that you purchased.
- Raspberry Pi Model 5 and 4B - requires a USB-C 5V 3.5A Power Supply and can be purchased here for approximately $10.00.
- Raspberry Pi Model 3B and 3B+ - requires a 5V 2.5A Power Supply and can be purchased here for approximately $10.00.
Important: Using anything other than the recommended power supplies can risk damaging your components.
Ethernet Cable
We highly recommend hard-wiring your Voltsec system to your router using a Cat5, Cat5-e or Cat6 ethernet cable. However, the Voltsec system does support wi-fi if you are unable to put your system near your router or a network switch.
Regardless if you setup your system wired or wireless, you will still need to plug your system directly into your router for the initial configuration (and setting up your wi-fi if you decide to use wireless).
OptionalScrew Terminals / Breakout Board
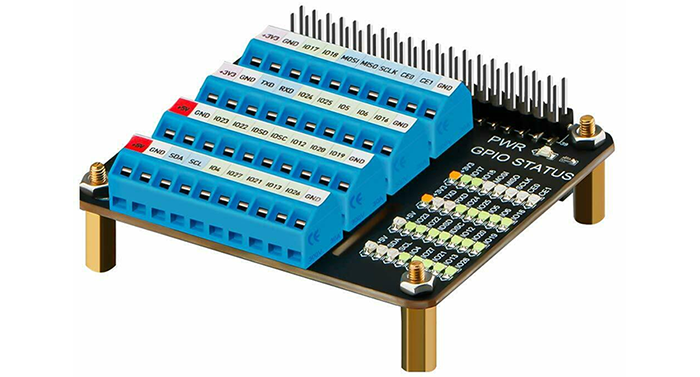
While the Raspberry Pi is an amazing piece of hardware, it is not easy to attach a security wire to the pins on the board. And the pins are not labeled, meaning that you need to look at the pinout schematics. Using a breakout board with screw terminals makes this a lot easier.
There are many options available for simplifying the hookup process. But the one that we like the most is a GPIO Expansion Board that can be purchased here for approximately $19.00.
Alternatively, you could use a breakout kit with a breadboard, such as the kit available here for approximately $9.00.


Expansion Boards
As much as we love the Raspberry Pi, one downfall is that there are only 22 GPIO pins available for use. For larger systems, this may not be enough and may require expansion boards.
Expansion boards can also be used for scenarios where a person has a detached garage and wants sensors installed in their garage. Instead of a need to run security wire for each sensor in the garage, a single CAT-5 wire could be used be bridge the garage and the main system.
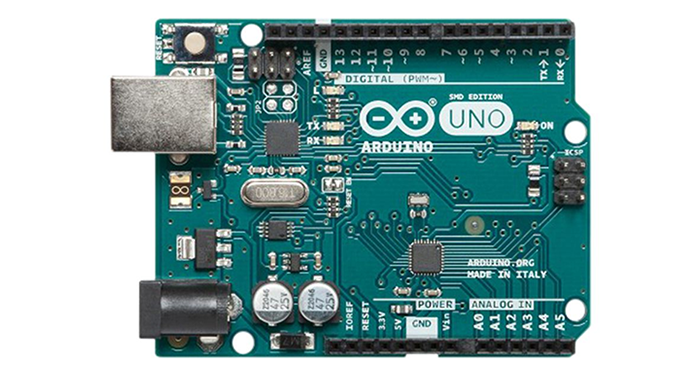
We use Adruino microcontrollers as our expansion boards. The following three boards are supported for use with the Voltsec system.


For more information, see our section on using expansion boards.
Optional5V Relay Switch Module(s)
Do you plan to hookup a siren? Do you want to be able to open your garage door with your system? Want to do more with your system? Your system has the ability to trigger relays to put your system to work for you. The size of the relay that you will need depends on how much you plan to hookup. At the price point, an 8 channel 5V relay module is a good bet!
OptionalStructured Enclosures
You will need to put your security system inside some kind of enclosure. What you want to put it in is completely up to you.
An old shoebox will work just fine. But if you would like something a little more "structured", we recommend a Leviton 14" enclosure, or a 28" enclosure for larger systems.
Important: Regardless of where you plan to mount or install your security system, it is important not to let the electronic connections on the back of the your system boards (Raspberry Pi or Arduino boards) come into contact with anything that can carry or short an electronic signal. If you use a metal enclosure, it is important to put some kind of felt padding or spacers behind the boards as a barrier. It may also be wise to cover all of the connection points on the back of the boards with hot glue. Failure to carefully mount your components can result in electrical shock and damage the components.
OptionalUPS Battery Backup
Your security system will be useless in a power outage. Unless you add a UPS to your system. UPS battery backups vary in size and capacity. But a good starting point would be the 600VA backup.
OptionalMiscellaneous Electrical
For larger systems, you may find that you run out of ground and 5V pins. When planning our your system, you may need to have some of the following electrical accessories to account for your specific scenario.
- 12V Power Adapter - Needed if you are going to use motion or glass break sensors. Available here.
- Screw Terminal Strip Block - Easily expand your 5v and GND pins for larger systems. Available here.
- Electrical Push Connectors - Safely and easily combine multiple wires together. Available here.
- Assorted jumper wires - Having problems connecting a stranded 18 AWG security wire to the Raspberry Pi? Use a jumper wire! Available here.
- Breadboards - Breadboards aren't the most secured way to install a system as the wires can be pulled out easily. But for people that like to play around with different configurations, you can't beat how easy they are to use! Available here.
Install Software
Are you all ready to install the Voltsec system on your Raspberry Pi and optional expansion boards? Click the button below to continue!